The concept of authentication has a very important place in application development processes. Different programming languages contain different solutions and approaches in themselves. In this article, while developing Rest API with Laravel Framework, we will authenticate with Laravel Passport, the official package of Laravel.
What is Laravel
Laravel is a PHP framework used for developing web applications. Laravel includes many advanced features and has many useful features of PHP and OOP. Laravel's motto, which is used by a wide audience, is: "Web Artists' PHP Framework". You can access the official document from this link: https://laravel.com/.
Why Laravel
It is preferred by many developers because it keeps pace with the rapid change of Software Technology and offers us software principles and saves us from most of the manual work (Authentication, Middleware, ORM, MVC) that is required for project development to make it fast, reliable and testable.
What is Laravel Passport
It is the official Laravel package that facilitates authentication in Rest APIs and is written with Laravel.
Creating a Boilerplate Application
In this section, we will develop a Rest API application in Laravel step by step and look at the use of Passport.
Install Laravel
First of all, we install Laravel Framework on our computer via Composer. If you do not have Composer on your computer, you can download it from this link (https://getcomposer.org/).
composer create-project --prefer-dist laravel/laravel blog
Install Passport
We will install Passport on our computer through Composer. Then we will perform the default setup of the database and tokens with the last two commands.
composer require laravel/passport

php artisan migrate
php artisan passport:install
Configure Passport
In this step, we will set up Passport settings. We create three different php extension files and paste the following codes.
File: app/User.php
        // app/User.php

        namespace App;
        use Illuminate\Notifications\Notifiable;
        use Illuminate\Contracts\Auth\MustVerifyEmail;
        use Laravel\Passport\HasApiTokens;
        use Illuminate\Foundation\Auth\User as Authenticatable;

        class User extends Authenticatable implements MustVerifyEmail
        {
            use HasApiTokens, Notifiable;
            /**
             * The attributes that are mass assignable.
             *
             * @var array
             */
            protected $fillable = [
                'name', 'email', 'password',
            ];

            /**
             * The attributes that should be hidden for arrays.
             *
             * @var array
             */
            protected $hidden = [
                'password', 'remember_token',
            ];
        }
File: app/Providers/AuthServiceProvider.php
        // app/Providers/AuthServiceProvider.php
        namespace App\Providers;

        use Laravel\Passport\Passport;
        use Illuminate\Support\Facades\Gate;
        use Illuminate\Foundation\Support\Providers\AuthServiceProvider as ServiceProvider;

        class AuthServiceProvider extends ServiceProvider
        {
            /**
            * The policy mappings for the application.
            *
            * @var array
            */
            protected $policies = [
                'App\Model' => 'App\Policies\ModelPolicy',
            ];

            /**
            * Register any authentication / authorization services.
            *
            * @return void
            */
            public function boot()
            {
                $this->registerPolicies();
            }
        }
File: config/auth.php
        // config/auth.php
        return [
            // ....
            'guards' => [
                'web' => [
                    'driver' => 'session',

                    'provider' => 'users',
                ],
                'api' => [
                    'driver' => 'passport',
                    'provider' => 'users',
                ],
            ],
            // ....
        ]
Add Product Table and Model
First, we run the following command to perform the database migration process.
php artisan make:migration create_products_table
After running this command, a file named "database / migrations" will be created in the project directory. Paste the codes below into this file
        use Illuminate\Support\Facades\Schema;
        use Illuminate\Database\Schema\Blueprint;
        use Illuminate\Database\Migrations\Migration;

        class CreateProductsTable extends Migration
        {
            /**
            * Run the migrations.
            *
            * @return void
            */
            public function up()
            {
                Schema::create('products', function (Blueprint $table) {
                    $table->bigIncrements('id');
                    $table->string('name');
                    $table->text('detail');
                    $table->timestamps();
                });
            }

            /**
            * Reverse the migrations.
            *
            * @return void
            */
            public function down()
            {
                Schema::dropIfExists('products');
            }
        }
After creating migration, we run the following command.
php artisan migrate
We created the "Product" table and now we will create our product model. We create a file named "Product.php" in the project directory and paste the following codes.
File: app/Product.php
        // app/Product.php
        namespace App;
        use Illuminate\Database\Eloquent\Model;
        class Product extends Model
        {
            /**
             * The attributes that are mass assignable.
             *
             * @var array
             */
            protected $fillable = [
                'name', 'detail'
            ];
        }
Create API Routes
In this step, we will create api routes. Laravel provides an api.php file for writing web services routes. So, let's add a new route on that file.
File: routes/api.php
        // routes/api.php
        /*
        |--------------------------------------------------------------------------
        | API Routes
        |--------------------------------------------------------------------------
        |
        | Here is where you can register API routes for your application. These
        | routes are loaded by the RouteServiceProvider within a group which
        | is assigned the "api" middleware group. Enjoy building your API!
        |
        */
        Route::post('register', 'API\RegisterController@register');
        Route::post('login', 'API\RegisterController@login');
        Route::middleware('auth:api')->group( function () {
            Route::resource('products', 'API\ProductController');
        });
Create Controller Files
In this step, we will create three Controllers as BaseController, ProductController and RegisterController, where we will create our Rest APIs. Paste the codes below.
File: app/Http/Controllers/API/BaseController.php
        // app/Http/Controllers/API/BaseController.php
        namespace App\Http\Controllers\API;
        use Illuminate\Http\Request;
        use App\Http\Controllers\Controller as Controller;

        class BaseController extends Controller
        {
            /**
            * success response method.
            *
            * @return \Illuminate\Http\Response
            */

            public function sendResponse($result, $message)
            {
                $response = [
                    'success' => true,
                    'data'    => $result,
                    'message' => $message,
                ];
                return response()->json($response, 200);
            }

            /**
            * return error response.
            *
            * @return \Illuminate\Http\Response
            */

            public function sendError($error, $errorMessages = [], $code = 404)
            {
                $response = [
                    'success' => false,
                    'message' => $error,
                ];

                if(!empty($errorMessages)){
                    $response['data'] = $errorMessages;
                }
                return response()->json($response, $code);
            }
        }
File: app/Http/Controllers/API/RegisterController.php
        // app/Http/Controllers/API/RegisterController.php
        namespace App\Http\Controllers\API;

        use Illuminate\Http\Request;
        use App\Http\Controllers\API\BaseController as BaseController;
        use App\User;
        use Illuminate\Support\Facades\Auth;
        use Validator;

        class RegisterController extends BaseController
        {
            /**
            * Register api
            *
            * @return \Illuminate\Http\Response
            */
            public function register(Request $request)
            {
                $validator = Validator::make($request->all(), [
                    'name' => 'required',
                    'email' => 'required|email',
                    'password' => 'required',
                    'c_password' => 'required|same:password',
                ]);

                if($validator->fails()){
                    return $this->sendError('Validation Error.', $validator->errors());
                }

                $input = $request->all();
                $input['password'] = bcrypt($input['password']);
                $user = User::create($input);
                $success['token'] =  $user->createToken('MyApp')->accessToken;
                $success['name'] =  $user->name;

                return $this->sendResponse($success, 'User register successfully.');
            }

            /**
            * Login api
            *
            * @return \Illuminate\Http\Response
            */
            public function login(Request $request)
            {
                if(Auth::attempt(['email' => $request->email, 'password' => $request->password])){
                    $user = Auth::user();
                    $success['token'] =  $user->createToken('MyApp')-> accessToken;
                    $success['name'] =  $user->name;

                    return $this->sendResponse($success, 'User login successfully.');
                }
                else{
                    return $this->sendError('Unauthorised.', ['error'=>'Unauthorised']);
                }
            }
        }
File: app/Http/Controllers/API/ProductController.php
        // app/Http/Controllers/API/ProductController.php
        namespace App\Http\Controllers\API;
        use Illuminate\Http\Request;
        use App\Http\Controllers\API\BaseController as BaseController;
        use App\Product;
        use Validator;
        use App\Http\Resources\Product as ProductResource;

        class ProductController extends BaseController
        {
            /**
            * Display a listing of the resource.
            *
            * @return \Illuminate\Http\Response
            */
            public function index()
            {
                $products = Product::all();

                return $this->sendResponse(ProductResource::collection($products), 'Products retrieved successfully.');
            }

            /**
            * Store a newly created resource in storage.
            *
            * @param  \Illuminate\Http\Request  $request
            * @return \Illuminate\Http\Response
            */
            public function store(Request $request)
            {
                $input = $request->all();

                $validator = Validator::make($input, [
                    'name' => 'required',
                    'detail' => 'required'
                ]);

                if($validator->fails()){
                    return $this->sendError('Validation Error.', $validator->errors());
                }

                $product = Product::create($input);

                return $this->sendResponse(new ProductResource($product), 'Product created successfully.');
            }

            /**
            * Display the specified resource.
            *
            * @param  int  $id
            * @return \Illuminate\Http\Response
            */

            public function show($id)
            {
                $product = Product::find($id);
                if (is_null($product)) {
                    return $this->sendError('Product not found.');
                }

                return $this->sendResponse(new ProductResource($product), 'Product retrieved successfully.');
            }

            /**
            * Update the specified resource in storage.
            *
            * @param  \Illuminate\Http\Request  $request
            * @param  int  $id
            * @return \Illuminate\Http\Response
            */

            public function update(Request $request, Product $product)
            {
                $input = $request->all();

                $validator = Validator::make($input, [
                    'name' => 'required',
                    'detail' => 'required'
                ]);

                if($validator->fails()){
                    return $this->sendError('Validation Error.', $validator->errors());
                }

                $product->name = $input['name'];
                $product->detail = $input['detail'];
                $product->save();

                return $this->sendResponse(new ProductResource($product), 'Product updated successfully.');
            }

            /**
            * Remove the specified resource from storage.
            *
            * @param  int  $id
            * @return \Illuminate\Http\Response
            */
            public function destroy(Product $product)
            {
                $product->delete();
                return $this->sendResponse([], 'Product deleted successfully.');
            }
        }
Create Eloquent API Resources
Eloquent API will help us to make the same response layout of your model object. We used it in the ProductController file.
php artisan make:resource Product
Now there is the created new file with new folder on following path:
File: app/Http/Resources/Product.php
        //app/Http/Resources/Product.php

        namespace App\Http\Resources;
        use Illuminate\Http\Resources\Json\JsonResource;
        class Product extends JsonResource
        {
            /**
            * Transform the resource into an array.
            *
            * @param  \Illuminate\Http\Request  $request
            * @return array
            */
            public function toArray($request)
            {
                return [
                    'id' => $this->id,
                    'name' => $this->name,
                    'detail' => $this->detail,
                    'created_at' => $this->created_at->format('d/m/Y'),
                    'updated_at' => $this->updated_at->format('d/m/Y'),
                ];
            }
        }
Test Application
To test our application, we will first run it in a local environment with the command below. Then we will test our Restful APIs through Postman.
php artisan serve
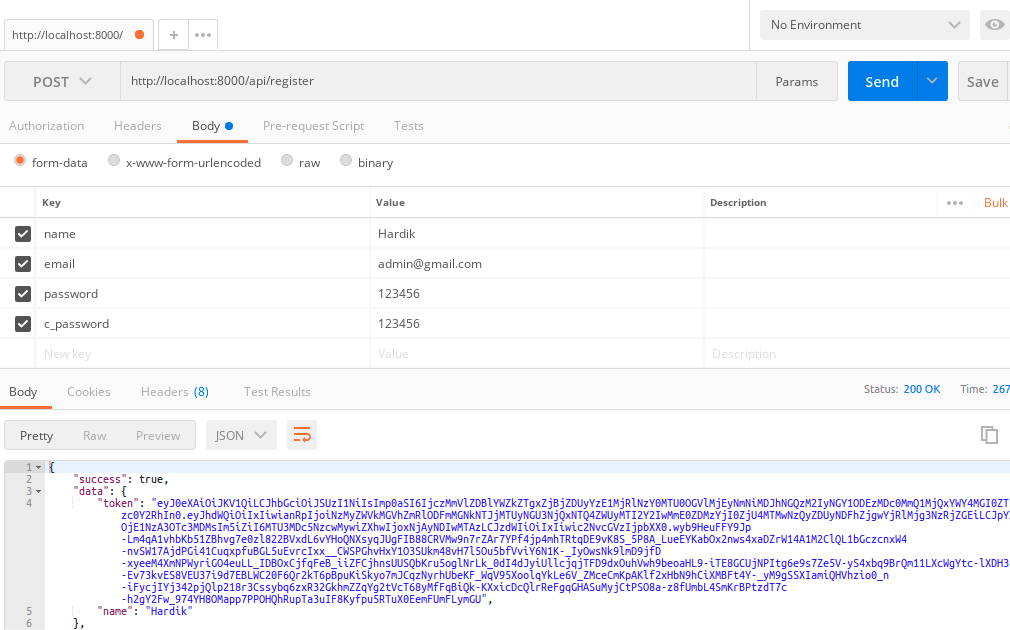
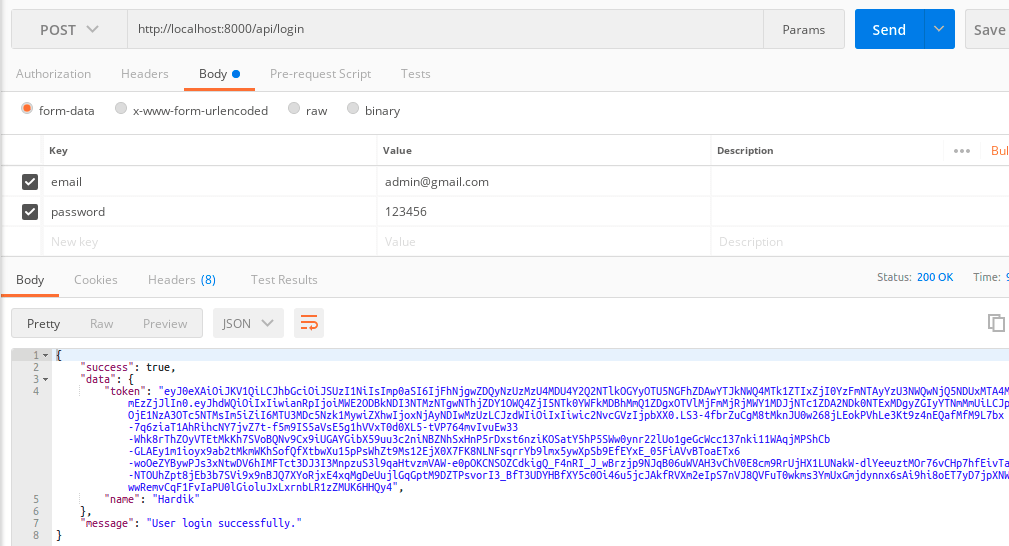
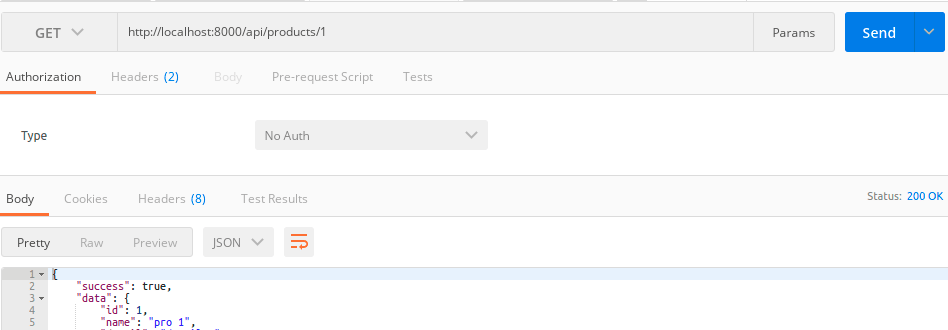
After running the application, we perform our tests with Postman. You can view the screenshots.
Register API: Verb:GET, URL:http://localhost:8000/api/register
Login API: Verb:GET, URL:http://localhost:8000/api/login
Product Create API: Verb:POST, URL:http://localhost:8000/api/products

Product Show API: Verb:GET, URL:http://localhost:8000/api/products/{id}
Conclusion
In this article, we made our Rest APIs more secure by using Passport with Laravel very quickly with the speed factor, which is the biggest feature that Laravel provides to developers. Hope this information will be useful.